-

Gold Dragon Hardcore/Zero
Gold Dragon Hardcore/Zero
View Details >
-
Gold Dragon Equipment
Gold Dragon Equipment
View Details >
-

Ark of Transcendence Season 3 [Future]
Ark of Transcendence Season 3 [Future]
View Details >
-

Collapse DJ Synthesis/Weekly Conquest Reward Changes
Collapse Dragon Jade Synthesis/Weekly Conquest Reward Changes
View Details >
-
Skill Enhancement Dragon Jade Unified Equip System
Skill Enhancement Dragon Jade Unified Equip System
View Details >
-

Changes/Additions
Changes/Additions
View Details >
-
Character Balancing
Character Balancing
View Details >
-

Bug Fixes
Bug Fixes
View Details >
-

Event
Event
View Details >
-

Miracle! Jelly Jelly!
Miracle! Jelly Jelly!
View Details >
-

Cash Item
Cash Item
View Details >


Gold Dragon Hardcore/Zero
Gold Dragon Hardcore
◆ Entry Information
• Location: [World Zone] Geraint's Room > Gold Dragon Nest Entrance Gate
• Access Route: [Town] Sandhill Shelter or [World Zone] Riverwort Wharf > [World Zone] Geraint's Room
• Min. Entry Level: Lv.100
• Entry Capacity: 5 - 8 players
• Entry Difficulty: Dimension 10F
• Entry Ticket Item: [Intense Golden Feather] x1
• Entry Ticket Purchase NPC: Butler B (Geraint's Room)
• Clears Per Week: 1
• Weekly Mid-stage Rewards: 1
• Max. Revives: 0 (no retries upon stage failure)


◆ Gold Dragon Nest Hardcore Features
• Gold Dragon Nest Hardcore is content that adds enhanced patterns and penalties to the normal Gold Dragon Nest.
• The penalties added to Gold Dragon Nest Hardcore are as follows:
• It is not possible to retry the stage upon failure. (Goddess Statuettes are not provided.)
• If even one person dies, the challenge fails.
◆ Entry Ticket Acquisition
• You can purchase Entry Tickets at Butler B's [Gold Dragon Shop] in Geraint's Room.
| Entry Ticket | Purchase Price | Purchase Limit | Usage Time Limit |
|---|---|---|---|
| Intense Golden Feather | Dimensional Vestige x100 1000 Gold |
2 weekly per character | 1 day after purchase |
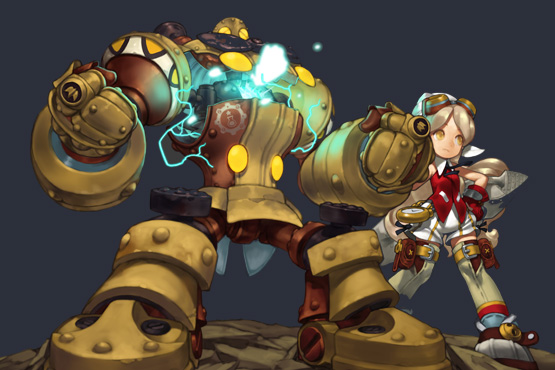
◆ Helper Skills
• In the Gold Dragon Nest, a Helper will appear to help adventurers clear the dungeon.
Use the Helper Skill to challenge the Gold Dragon Nest alongside an NPC companion.
• The Helper Skill can only be used by the party leader and is a special skill with powerful effects.
• The Helper Skill has different attack methods and effects for each stage.


※ The Helper Skill is automatically learned upon entering the Gold Dragon Nest.
※ The Helper Skill can be used by the party leader by pressing the F11 button when conditions are met.
※ The Helper Skill UI is displayed below the minimap.
◆Gold Dragon Nest Hardcore Rewards
• Defeat the bosses for each stage in Gold Dragon Nest Hardcore to obtain the stage rewards within.
• Defeat Corrupt Gold Dragon at the last stage of Gold Dragon Nest Hardcore to obtain the final reward.
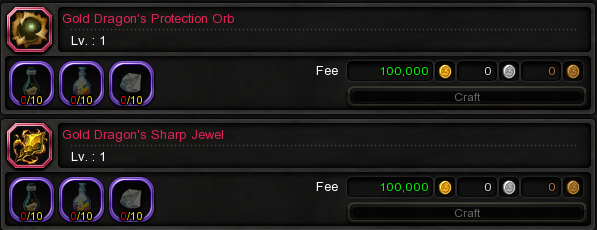
• Gold Dragon Jewel Fragments obtained from each stage in Gold Dragon Nest Hardcore can be used as materials for evolving Ancient Dragon Equipment, enhancing Gold Dragon Equipment, and resetting the Ark's Power.
• In Gold Dragon Nest Hardcore, you can obtain Gold Dragon Equipment from each stage.
• In Gold Dragon Nest Hardcore, you can obtain Gold Dragon's Dragon Jade Stabilizers and Fragments from each stage, which reduce the destruction chance when Gold Dragon's Dragon Jade enhancement fails after +5.
• If the number of party members is less than 8 when clear rewards are distributed, the probability of obtaining rewards decreases based on the number of party members.
◆ Gold Dragon Nest Hardcore Stage Rewards
Drop information is based on an 8-person party, and probabilities decrease if the clear is achieved with fewer than 8 players.
| Item | Description | Stage 1 | Stage 2 | Cleared |
|---|---|---|---|---|
| Golden Memory | Gold Dragon's Dragon Jade crafting and enhancement material | Guaranteed drops per player x2 | Guaranteed drops per player x3 | Guaranteed drops per player x3 |
| Faded Memory | Gold Dragon's Dragon Jade crafting and enhancement material | Guaranteed drops per player x10 | Guaranteed drops per player x20 | Guaranteed drops per player x30 |
| Low rate x50 | Low rate x100 | Low rate x150 | ||
| Guardian's Energy | Key item for Ancient Dragon Armor slot expansion | Low drop rate per player x1 | Low drop rate per player x1 | Low drop rate per player x1 |
| Guardian's Energy Crystal | Guardian's Energy crafting material item | Guaranteed drops per player x2 | Guaranteed drops per player x2 | Guaranteed drops per player x5 |
| Low rate x10 | Low rate x10 | Low rate x25 | ||
| Shiny Hero Coin | 10,000 Gold | Guaranteed drops per player x2 | Guaranteed drops per player x2 | Guaranteed drops per player x3 |
| [Bestie] Luminous Gold Dragon Pouch | A pouch that contains a Gold Dragon mount | - | - | Low rate per party x1 |
| Faded Pendant | Gold Dragon Buff | - | - | Guaranteed 1 per party |
| Remote Quest starting item | ||||
| Gold Dragon Jewel Fragment | Material for Ancient Dragon Equipment evolution, Gold Dragon Equipment enhancement, and Gold Dragon Equipment add-on stat resetting. | Guaranteed drops per player x2 | Guaranteed drops per player x3 | Guaranteed drops per player x5 |
| Dragon Jade Stabilizer Fragment | Currency used to purchase Gold Dragon's Dragon Jade Stabilizers from Butler B | Guaranteed drops per player x5 | Guaranteed drops per player x5 | Guaranteed drops per player x5 |
| Gold Dragon Equipment | Gold Dragon Armor and Weapons | Armor (1 type) | Armor (1 type) | Weapon (1 type) |
| Gold Dragon's Dragon Jade Stabilizer | An item that permanently reduces the destruction chance to 0% when enhancement fails at +5 or above on a Gold Dragon's Dragon Jade (Applies to all enhancement levels) |
- | - | Low rate per party x1 |
| Blessed Gold Dragon's Dragon Jade | Use to randomly obtain 1 of 5 possible Blessed Gold Dragon's Dragon Jade types. | - | - | When Blessing Box appears |
| Guaranteed 1 per party |
Gold Dragon Zero
◆ Entry Information
• Location: [World Zone] Geraint's Room > Gold Dragon Nest Entrance Gate
• Access Route: [Town] Sandhill Shelter or [World Zone] Riverwort Wharf > [World Zone] Geraint's Room
• Min. Entry Level: Lv.100
• Entry Capacity: 5 - 8 players
• Entry Difficulty: Adjusted
• Entry Ticket Item: [Dim Golden Feather] x1
• Entry Ticket Purchase NPC: Butler B (Geraint's Room)
• Clears Per Week: 1
• Weekly Mid-stage Rewards: 1
• Max. Revives: 0
• Unlimited stage retry attempts provided upon stage failure


◆ Entry Ticket Acquisition
• You can purchase Entry Tickets at Butler B's [Gold Dragon Shop] in Geraint's Room.
| Entry Ticket | Purchase Price | Purchase Limit | Usage Time Limit |
|---|---|---|---|
| Dim Golden Feather | Dimensional Vestige x100 | 2 weekly per character | 1 day after purchase |
◆ Helper Skills
• In the Gold Dragon Nest, a Helper will appear to help adventurers clear the dungeon.
Use the Helper Skill to challenge the Gold Dragon Nest alongside an NPC companion.
• The Helper Skill can only be used by the party leader and is a special skill with powerful effects.
• The Helper Skill has different attack methods and effects for each stage.
※ The Helper Skill is automatically learned upon entering the Gold Dragon Nest.
※ The Helper Skill can be used by the party leader by pressing the F11 button when conditions are met.
※ The Helper Skill UI is displayed below the minimap.
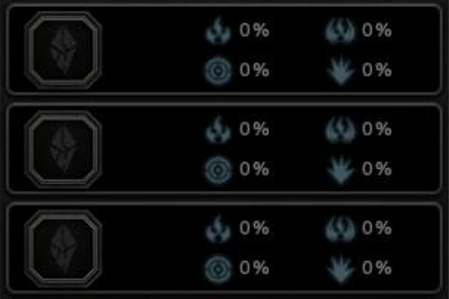
◆ Gold Dragon Zero – Resonance Stone
• Resonance Stones are special items that allow you to obtain the "Power of Resonance" within Gold Dragon Zero.
• Resonance Stones consist of 6 grades, each with 3 levels. As the levels and grades increase, the "Power of Resonance" becomes stronger.
• Resonance Stones can be crafted by the Blacksmith using lower-level Resonance Stones and Resonance Fragments.
• The Faint Resonance Stone (Lv.1) item can be disassembled using a Disassembler to obtain Resonance Fragments.
• Resonance Fragments can be obtained by completing Weekly Tasks, Resonance Missions, and Feats.
• Can be obtained by clearing World Weekly Task - World Daily Tasks 35 times.
• Resonance Missions can be viewed under [Mission (L) – Dungeon (Special) – Resonance Mission – Gold Dragon Nest Zero].


◆ Gold Dragon Zero – Role Skills
• In Gold Dragon Zero content, you can use "Role Skills" depending on your role group and class through the [Sealed Pendant].
• All Role Skills apply effects to you and your party.
• Role Skills stack with existing Class Skill effects.
• The same Role Skill does not stack.
| Item Name (Skill Name) | Class | Skill Effect | Cooldown |
|---|---|---|---|
| Command Sealed Pendant | Destroyer, Guardian, Defensio | • 200% Protective Shield granted • Super Armor greatly increased • Physical/Magic ATK +10% • Duration: 15 sec |
90 sec |
| Retort Sealed Pendant | Destroyer, Guardian, Defensio | • Blocks some enemy skills | 90 sec |
| Salvation Sealed Pendant | Saint, Physician, Light Fury, Luster | • Removes 10 status ailments • Received Damage -70% • Physical/Magic ATK +15% • Duration: 15 sec |
90 sec |
| Warrior Sealed Pendant | Gladiator, Moonlord, Barbarian, Dark Avenger, Mystic Knight, Grand Master | • Physical/Magic ATK +25% • Duration: 15 sec |
90 sec |
| Archer Sealed Pendant | Sniper, Artillery, Tempest, Wind Walker, Silver Hunter | • Movement/Action SPD +30% • Duration: 10 sec |
90 sec |
| Sorceress Sealed Pendant | Saleana, Elestra, Smasher, Majesty, Black Mara | • Cooldown Recovery Speed +60% • Duration: 10 sec |
90 sec |
| Cleric Sealed Pendant | Crusader, Inquisitor, Arch Heretic | • All Attribute ATK +25% • Duration: 15 sec |
90 sec |
| Academic Sealed Pendant | Shooting Star, Gear Master, Adept, Ray Mechanic | • Vending machine drops item (see table below) | 90 sec |
| Kali Sealed Pendant | Dark Summoner, Soul Eater, Blade Dancer, Spirit Dancer, Oracle Elder | • +0.5% additional damage per 1% enemy HP depleted (up to +25%) • Duration: 15 sec |
90 sec |
| Assassin Sealed Pendant | Ripper, Raven, Abyss Walker, Bleed Phantom | • When enemy HP is below 50%, +0.6% additional damage per 1% enemy HP depleted (up to +30%) • Duration: 10 sec |
90 sec |
| Lancea Sealed Pendant | Flurry, Sting Breezer, Avalanche, Randgrid, Vena Plaga | • All attacks land as critical hits • Duration: 15 sec |
90 sec |
| Machina Sealed Pendant | Ruina, Impactor, Beastia Reina | • Final Damage +20% • Duration: 15 sec |
90 sec |
| Vandar Sealed Pendant | Duelist, Trickster, Revenant, Maverick | • +20% damage on Critical Hit • Duration: 15 sec |
90 sec |
| Arta Sealed Pendant | Ringmaster | • +10% Hero Gauge per 1 sec • Duration: 10 sec |
90 sec |
• When a Saint uses the [Salvation Sealed Pendant], they can instantly summon a "Miracle Relic" at a desired location using the [Normal Attack Button].
• When a Light Fury uses the [Salvation Sealed Pendant], they can instantly tumble backward and return to their original position using the [Special Attack Button].
[Academic Sealed Pendant]
• When using the [Academic Sealed Pendant] skill, the Automat that appears may drop a special item.
• The special items are displayed below, and exactly one will drop.
• The Automat skill effect of the [Academic Sealed Pendant] stacks with the existing [Automat] skill effect.
| Special Item Type | Skill Effect |
|---|---|
| Limited Edition Immortal Mushroom | • Recovers 100% Cooldown |
| Limited Edition Fotiaogiang Soup | • Cooldown Recovery Speed +20% • Duration: 20 sec |
| Limited Edition Dragon Chewy Cookie | • Hero Gauge Recovery +100% • Duration: 20 sec |
| Limited Edition Evenly Cooked Beef | • Gives Invincibility buff • Duration: 10 sec |
| Limited Edition Super Protein Supplement | • All attacks land as critical hits • Duration: 20 sec |
| Limited Edition Love Mint Chocolate | • Physical/Magic ATK +50% • Duration: 20 sec |
| Limited Edition Rapid Aging Salad | • All Attribute ATK +50% • Duration: 20 sec |
| Limited Edition Warm Ice Americano | • Critical hits deal +30% damage • Duration: 20 sec |
◆ Gold Dragon Zero – Special Skill
• These are "Special Skills" that can be obtained by playing Gold Dragon Zero content.
• Special Skills can be used without class restrictions and apply debuff effects upon hitting enemies.
• Special Skills stack with existing class skill effects.
| Item Name (Skill Name) | Skill Effect | Cooldown |
|---|---|---|
| Black Dragon Sealed Pendant | • Received Physical/Magic damage -30% • Duration: 25 sec |
90 sec |
| Karahan Sealed Pendant | • Dark Resistance -30% • Duration: 25 sec |
90 sec |
| Fujinorth Sealed Pendant | • Light Resistance -30% • Duration: 25 sec |
90 sec |
| Sea Dragon Sealed Pendant | • Water Resistance -30% • Duration: 25 sec |
90 sec |
| Cerberus Sealed Pendant | • Fire Resistance -30% • Duration: 25 sec |
90 sec |
◆ Gold Dragon Nest Zero Rewards
• Defeat the bosses for each stage in Gold Dragon Nest Zero to obtain the stage rewards within.
• Defeat Corrupt Gold Dragon at the last stage of Gold Dragon Nest Zero to obtain the final reward.
• Gold Dragon Scale Powder obtained from each stage in Gold Dragon Nest Zero can be used as a material for evolving Ancient Dragon Equipment, and enhancing Gold Dragon Equipment.
• Materials for crafting and enhancing Gold Dragon's Dragon Jade can be obtained in each stage of Gold Dragon Nest Zero.
• In the final stage of Gold Dragon Nest Zero, you can obtain Gold Dragon's Dragon Jade Stabilizer Fragments, which reduce the destruction chance when Gold Dragon's Dragon Jade enhancement fails after +5.
• Blessing Boxes do not appear in Gold Dragon Nest Zero.
• Golden Box and Silver Box rewards do not appear in Gold Dragon Nest Zero.
• If the number of party members is less than 8 when clear rewards are distributed, the probability of obtaining rewards decreases based on the number of party members.
◆ Gold Dragon Nest Zero Stage Rewards (edited on 260609)
• Drop information is based on an 8-person party, and probabilities decrease if the clear is achieved with fewer than 8 players.
| Item | Description | Stage 1 | Stage 2 | Cleared |
|---|---|---|---|---|
| Golden Memory | Gold Dragon's Dragon Jade crafting and enhancement material | Guaranteed drops per player x1 | Guaranteed drops per player x1 | Guaranteed drops per player x2 |
| Faded Memory | Gold Dragon's Dragon Jade crafting and enhancement material | Guaranteed drops per player x2, Low rate x10 | Guaranteed drops per player x2, Low rate x10 | Guaranteed drops per player x2, Low rate x10 |
| Guardian's Energy | Key item for Ancient Dragon Armor slot expansion | Low rate per player x1 | Low rate per player x1 | Low rate per player x1 |
| Guardian's Energy Crystal | Guardian's Energy crafting material item | Guaranteed drops per player x1 | Guaranteed drops per player x1 | Guaranteed drops per player x2 |
| Gold Dragon Scale Powder | Material for Ancient Dragon Equipment evolution, Gold Dragon Equipment enhancement | Guaranteed drops per player x2 | Guaranteed drops per player x3 | Guaranteed drops per player x5 |
| Dragon Jade Stabilizer Fragment | Currency used to purchase Gold Dragon's Dragon Jade Stabilizers from Butler B | - | - | Guaranteed drops per player x2 |
◆ Sealed Pendant
• A special pendant usable only in Gold Dragon Nest Zero has been added.
• Sealed Pendants are divided into three types: class-group exclusive, class exclusive, and special pendants.
• Class-group exclusive: Tanker class exclusive, Support class exclusive
• Tanker classes: Destroyer, Guardian, Defensio
• Support classes: Saint, Physician, Light Fury, Luster
• Class exclusive: Exclusive pendant for each class (Classes that use a class-group exclusive pendant cannot use a class exclusive pendant.)
• Special pendant: Usable by all classes
• Sealed Pendants can be purchased from the shop located in the [Butler B] – [Gold Dragon Shop] – [Pendants] tab.
• Golden Coins are required to purchase Sealed Pendants.
• Golden Coins are guaranteed to be acquired upon clearing normal nests (12 types).
• Sealed Pendants can only be used in Gold Dragon Nest Zero
Gold Dragon
◆ Gold Dragon Nest Stage Rewards Added
• Drop information is based on an 8-person party, and probabilities decrease if the clear is achieved with fewer than 8 players.
| Item | Description | Stage 1 | Stage 2 | Cleared |
|---|---|---|---|---|
| Gold Dragon Plate Powder | Material for Ancient Dragon Equipment evolution, Gold Dragon Equipment enhancement | Guaranteed drops per player x2 | Guaranteed drops per player x3 | Guaranteed drops per player x5 |
| Dragon Jade Stabilizer Fragment | Currency used to purchase Gold Dragon's Dragon Jade Stabilizers from Butler B | Guaranteed drops per player x1 | Guaranteed drops per player x1 | Guaranteed drops per player x3 |
◆ Gold Dragon Nest Balancing Modifications
• The difficulty of some stages has been lowered to make progressing through the content more enjoyable and reduce combat fatigue.
| Stage | Target Mode | Target Monster |
|---|---|---|
| Stage 1 |
Gold Dragon Nest / [Honor] Gold Dragon Nest |
Corrupt Creation |
| Stage 2 | Gold Dragon Nest /
[Honor] Gold Dragon Nest |
Black Knight Velskud The Specter of the Black Knight |
| Stage 3 | Gold Dragon Nest /
[Honor] Gold Dragon Nest |
Corrupt Creation Corrupt Gold Dragon Dividing Corrupt Creation |
Top